How to Edit Jewelry Photos to Make Them Shine (Updated 2024)

How to Edit Jewelry Photos to Make Them Shine (Updated 2024)
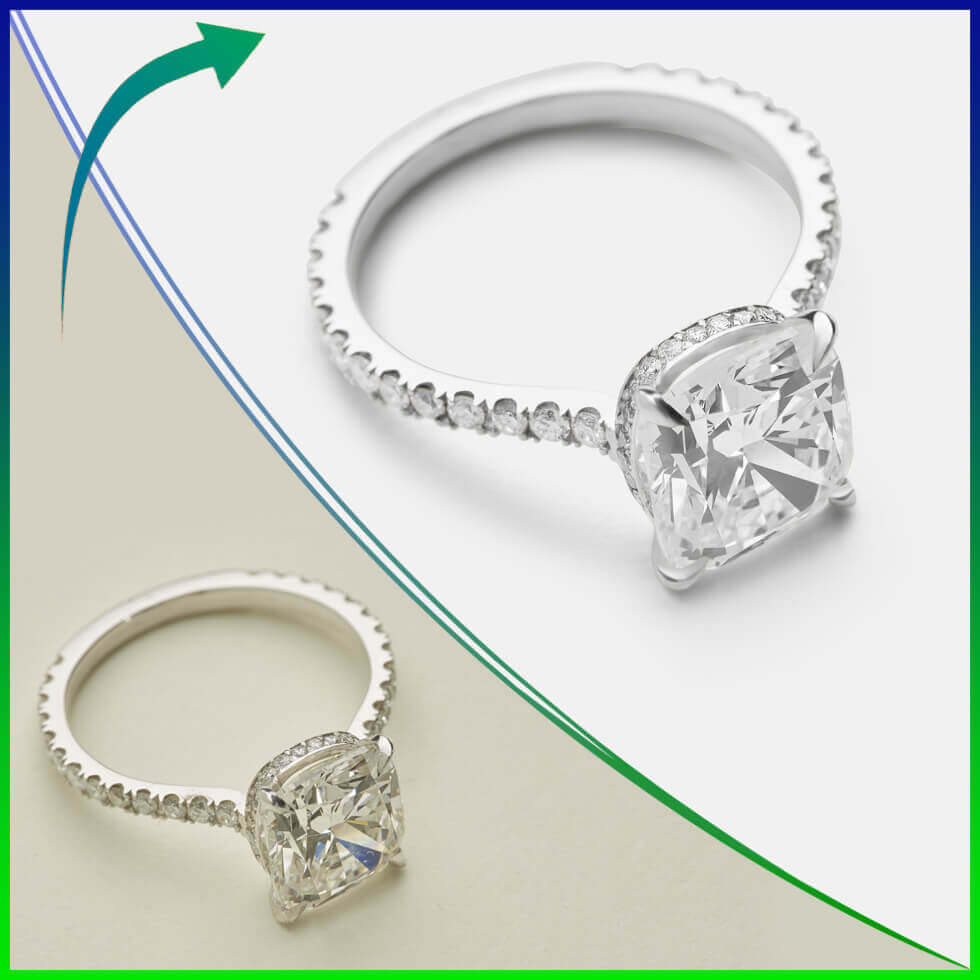
Captivating jewellery photography is essential for showcasing the beauty of your pieces, whether for an e-commerce store, social media, or a professional portfolio. However, even the most well-shot images can benefit from post-production editing to highlight every sparkle and detail. In this comprehensive guide, we'll walk you through how to edit jewellery photos perfectly, ensuring they dazzle and convert viewers into customers.
The Importance of Editing Jewelry Photos
In jewellery photography, details are everything. Jewellery pieces are intricate, reflective, and often negligible, which makes them challenging to photograph perfectly. Editing enhances these elements, ensuring that the jewellery's texture, brilliance, and craftsmanship stand out.
A well-edited photo achieves:
· Enhanced Clarity: Every stone, metal finish, and intricate design looks sharp and defined.
· Colour Accuracy: Ensure gemstones and metals appear true to life.
· Professional Appeal: A polished image builds trust and elevates brand perception.
Essential Tools for Jewelry Photo Editing
Professional Editing Software
You'll need advanced tools that provide precision to edit jewellery photos effectively. Here are some of the best:
· Adobe Photoshop: The industry standard for detailed photo editing.
· Adobe Lightroom: Great for batch editing and lighting adjustments.
· Affinity Photo: A budget-friendly alternative to Photoshop.
· Canva (Pro): Ideal for beginners, offering essential editing tools and templates.
Accessories to Improve Editing Workflow
· Graphics Tablet: Precise tools like Wacom tablets give better control for intricate edits.
· Calibrated Monitor: Ensures color accuracy while editing.
· High-Resolution Images: Start with high-quality photos to achieve the best results.
Step-by-Step Guide to Editing Jewelry Photos
Adjust the Background
A clean and distraction-free background ensures that the jewellery remains the focal point.
Remove Distractions
Use Photo-shop's Background Eraser Tool or Select and Mask to remove unwanted objects.
Replace busy backgrounds like white, black, or gradient colors with neutral tones.
Add Depth with Gradients
A gradient background adds a professional and elegant touch, drawing attention to the jewellery piece.
Correct Lighting and Exposure
Jewelry often requires precise lighting to highlight its brilliance. Editing allows you to fine-tune this aspect.
Enhance Highlights and Shadows
Use the Curves Adjustment Layer in Photo-shop to create contrast.
Avoid overexposure, which can wash out intricate details.
Eliminate Reflections
Reflections are a common issue in jewellery photography. Clone tools or spot healing can remove unwanted glare and polish surfaces.
Sharpen Details
Sharpness brings out the fine craftsmanship of a jewellery piece.
Use High Pass Filter for Precision
Duplicate the image layer, apply a High Pass Filter, and set it to overlay mode.
This technique enhances edges without over-sharpening.
Highlight Intricate Features
Use tools like Dodge and Burn to brighten prongs, engravings, or facets of gemstones subtly.
Enhance Colors
Gemstones and metals must look vibrant yet true to life.
Adjust Hue, Saturation, and Vibrance
Use the Hue/Saturation Tool to correct any discrepancies in gemstone colours.
Increase vibrance slightly to make gemstones pop without appearing artificial.
White Balance Correction
Proper white balance ensures that gold, silver, and platinum appear accurate. Use a colour picker tool to adjust any tints.
Add Sparkle and Shine
A touch of sparkle adds life to your jewellery images.
Use Brushes for Sparkle Effects
Add a new layer, then use custom sparkle brushes to emphasize light reflection on gemstones.
Keep the effect subtle to avoid making the image look unrealistic.
Glow for Gemstones
Apply a soft glow around gemstones using the Gaussian Blur Tool to mimic natural brilliance.
Final Touches
The final step ensures that the photo is polished and ready for use.
Retouch Imperfections
Use the Spot Healing Brush or Clone Stamp Tool to remove scratches, dust, or blemishes.
Pay close attention to metal surfaces and prongs.
Resize and Optimize for Web
Resize images to the dimensions required by your platform without compromising quality.
Use image compression tools to reduce file size for faster loading speeds.
Advanced Tips for Jewelry Photo Editing
Work with RAW Images
Always shoot in RAW format to retain maximum detail and flexibility during editing.
Create Consistency
Establish editing presets to ensure uniformity across all your product photos.
Incorporate Natural Shadows
Rather than removing all shadows, adjust them to add depth and realism.
FAQs About Jewelry Photo Editing
What is the best software for editing jewellery photos?
Adobe Photoshop is the best choice for precision edits, while Lightroom excels in batch processing and colour adjustments.
How do I avoid reflections when editing?
Use the clone or healing tools to remove unwanted reflections. Prevent them during the shoot by using diffused lighting.
Should I permanently remove the background in jewellery photos?
Only sometimes. While white backgrounds are great for e-commerce, lifestyle shots can benefit from natural or contextual backdrops.
How do I make gemstones look more vibrant?
Adjust the vibrance and saturation, and use custom brushes to add sparkle while maintaining a natural appearance.
Can I edit jewellery photos without professional tools?
Yes, basic edits can be done with tools like Canva or GIMP, but professional software like Photoshop provides better precision.
How do I maintain colour accuracy?
Calibrate your monitor and use the white balance tool to ensure the colours of gemstones and metals are true to life.
Conclusion
Editing jewellery photos is a fine art that brings out the brilliance and craftsmanship of each piece. Following these detailed steps, you can transform your images into stunning visual showcases that captivate customers and drive sales. Whether you're a professional photographer or a jewellery brand owner, perfecting your editing skills is essential in today's competitive market.
Elevate your jewellery images with these tips, and watch your pieces shine brighter than ever!


